in
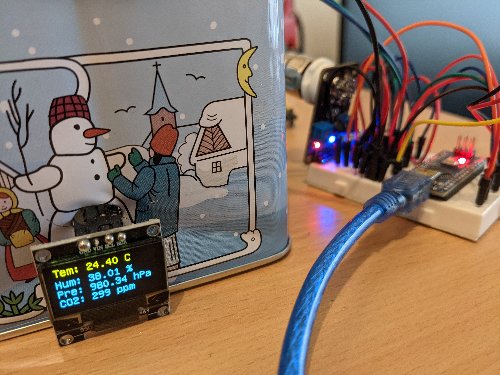
in A weather station is a hello world build for everyone starting with Arduino. It makes perfect sense. Hello world is about making something super simple, and a weather station can be just that. It’s simply about connecting a sensor or two to the Arduino board, loading a library for it, and writing a few simple lines of code to display measured values in the monitoring tool on the computer screen.
Ok, maybe that’s already too much. Actual hello world is usually a one-liner and not a very useful line. That would be to light up a LED. Let’s say the weather station is like a to-do list application which is a hello world for JavaScript frameworks.
Temperature and humidity
Either way, I put a few such builds together soon after I got my first Arduino, and I believe you will do the same when you get yours. My box contained HTU21D as a temperature and humidity sensor and BMP180 as a pressure sensor or barometer. Both sensors use the I2C bus; thus, I connected SDAs to pin A4, SCLs to A5, GNDs to GND, and VCCs to 3 or 5V pin (mine works with both levels; double-check what your version needs).
Once we have it all connected, the next step is reading the values. The good part about those common sensors is there are libraries for them. To read temperature and humidity, let’s simply use HTU21D library, which can be used like this:
#include "SparkFunHTU21D.h"
HTU21D sensorHTU;

void setup() {
    Serial.begin(9600);
    sensorHTU.begin();
}

void loop() {
    float temperature = sensorHTU.readTemperature();
    float humidity = sensorHTU.readHumidity();

    Serial.print("Temperature: ");
    Serial.print(temperature);
    Serial.print("°C");
    Serial.print("Humidity: ");
    Serial.print(humidity);
    Serial.println("%");

    delay(1000);
}
Pressure
Similarly, we can use BMP085 library to get pressure basically the same way. If you are curious about why we use the BMP085 library for the BMP180 sensor, no worries, it’s all fine. BMP180 is just a cheaper and less precise version of BMP085 with the same interface.
If you connect all things and run the readings, you might notice that the pressure is way off. Is that sensor really so much inaccurate? Not really. You just need to calibrate it based on your altitude. The question is whether you even need the calibration. I don’t care. Honestly, the exact value will not say to me much anyway. I even didn’t know why I should care about pressure until I read the book Weather for Dummies. It’s not a perfect book, and I don’t recommend reading it. But at least it explained to me how pressure works:
In a nutshell, the trend is crucial. When the pressure goes up, a warm wave is coming, and thus we can expect nicer weather. At least more sun and warmth is what we usually call nice. And conversely, if pressure is falling, it brings a bigger chance of rain and colder weather. You can think of it as a mountain (high pressure) and a valley (low pressure): water always flows down.
I tested it with uncalibrated sensors, and it works just as well. My readings are only way lower than the actual pressure.
Air quality
Displaying temperature, humidity and pressure is nice but doesn’t make much of an impression. Many products do the same for less money, so it might even be boring. I wanted something more. First idea was to open and close windows automatically, but soon I realized that is way out of scope. For now. Instead, I directed my focus to air quality.
I made two mistakes. First, I focused on CO2 and looked for sensors sensitive to this gas. I bought quite an expensive MG-811. The problem is that this sensor needs 6V, so you cannot power it simply with an Arduino board. Also, the sensor has to be calibrated for conversion to PPM. It’s not plug & play.
My second mistake was basically the same but dropping the 2 and looking for a sensor sensitive to CO. For that, I found MQ-9. The very cheap sensor that can be plugged into a 5V pin. The problem is that CO is not what I was looking for. MQ-9 can be great for fire detection applications but useless for detecting air quality.
What you want for air quality is MQ-135, a sensor sensitive to a wide range of gases you don’t want to breathe in your home or office. The connection is effortless, and reading can be done via analog output for precise resistance or also via a digital output to get a signal only when the readings are higher than a set threshold.
Personally, I use analog values. MQ-135, like all other gas sensors, needs calibration for proper warning levels. You might be tricked by some libraries that provide a convenient way of getting ppm level, but don’t use it without calibration. All such libraries have hard-coded values, which will indeed not be aligned with your setup.
Because I wanted several stations, I didn’t want to bother with the calibration of every setup, pay attention which one I connect to what board and properly load the correct code. Instead, I use air quality the same way as pressure readings. In the end, I don’t care about PPM or comparison between rooms. The trend is essential. Is it high than usual for that room? Then I should open the window. It’s simple like that.
Ok. We can read values, but we must collect them to see the trends. Let’s continue next time.